Build your first App in C#.Net
C#.Net is one of the best programming languages in the world. It is used by professionals in business and in robotics. In this lecture you will create your first Hello World using in C#.Net in Ozeki 10. You will use Visual Studio to build this app. You will learn how to create a new project, how to create a HTML user interface and how to register your app into the Ozeki 10 start menu.
Stop the Ozeki 10 service!
Before you start to develop your first application for your Ozeki 10 in C#.NET, you need to stop the Ozeki 10 service in services.msc.
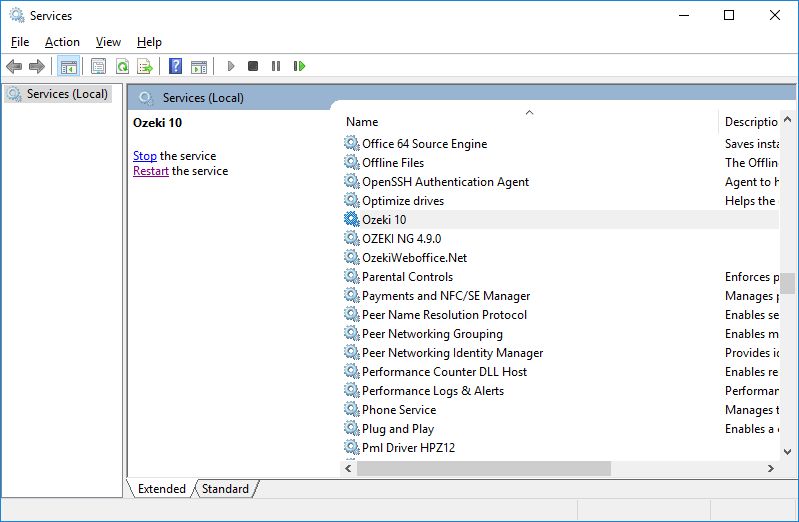
Figure 1 - Stop Ozeki 10 service
Start visual studio!
The next step is to start your Visual Studio as an administrator.
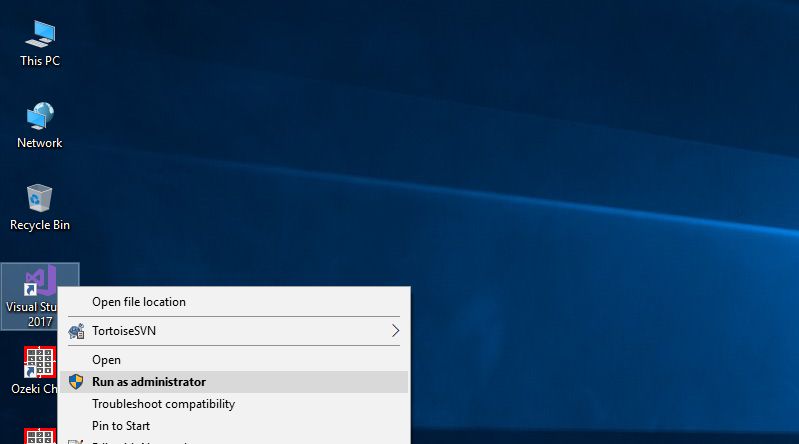
Figure 2 - Run Visual Studio as amdinistrator
Create a new class library project!
Click on File menu, then select New and Project menu. On the appear window, select Class Library (.NET Framework) and choose .NET Framework 4.5.2.
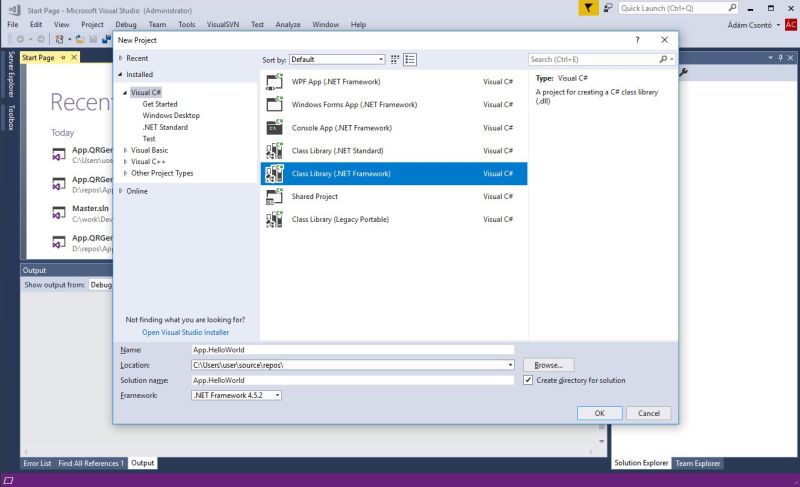
Figure 3 - Create a class library project
Set Ozeki 10 as your debug environment!
Go to the project Properties menu. Click on Build button on the left side of the properties and set C:\Program Files\Ozeki\Ozeki10 in the textbox belongs to Output path.
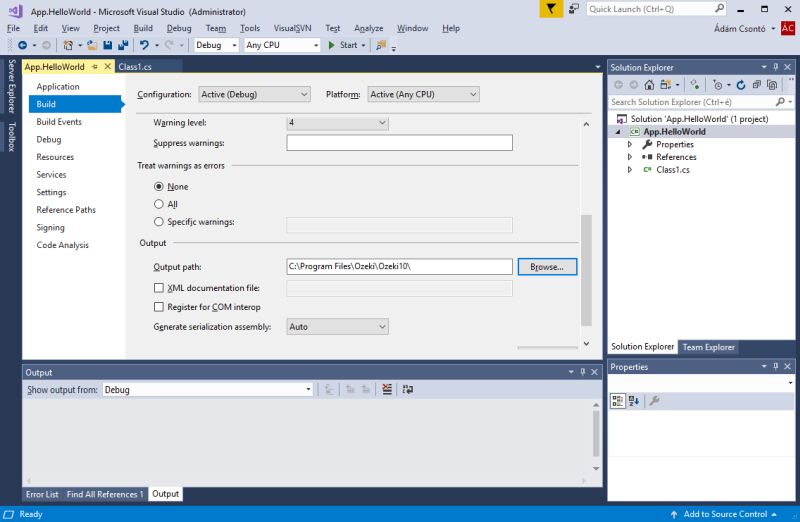
Figure 4 - Set the output path
Click on Debug button on the left menu, then select Ozeki10.exe to be run as external program and setup /run as a command line argument.
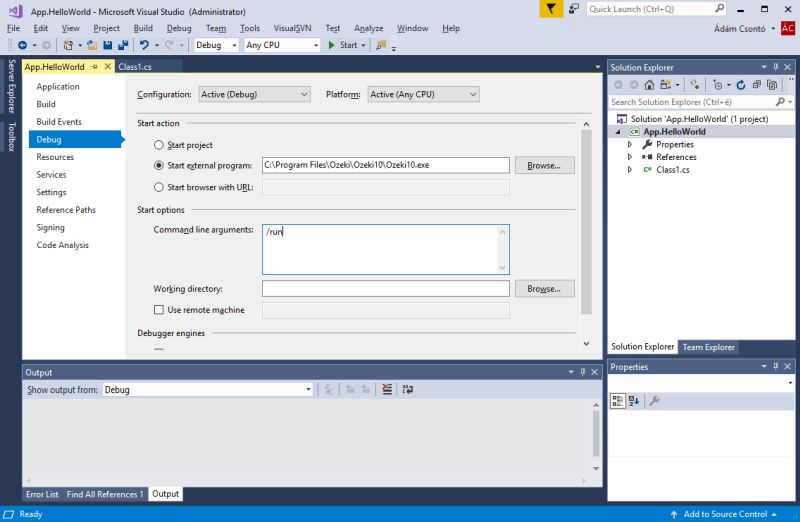
Figure 5 - Select exe to run
Add Ozeki API references!
Add Ozeki.Base.dll and Ozeki.Common.dll to your references. You can find them in the main directory of Ozeki 10: C:\Program Files\Ozeki\Ozeki10.
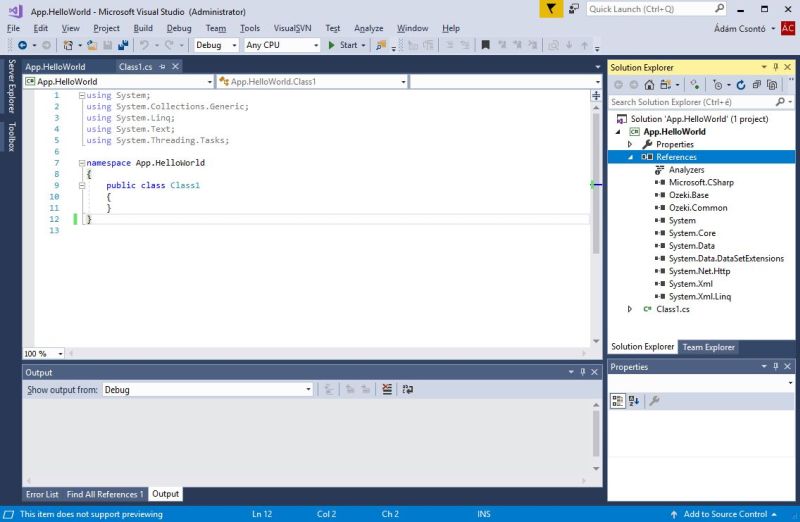
Figure 6 - Add references
Create your first class!
The next step is to create your first class: AppHelloWorld.cs. Right click on the name of the project, and select Add and New Item menus.
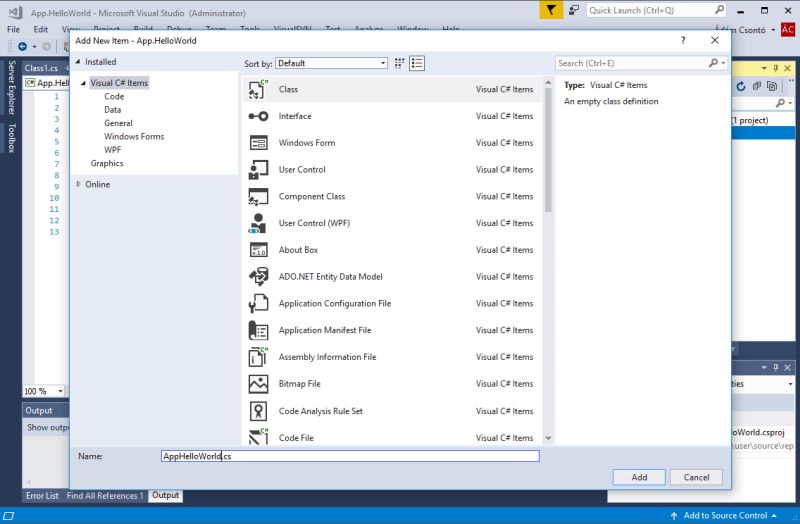
Figure 7 - Create a class
Give a name to your app!
First you need to replace the namespace of your class to Ozeki and derive the new AppHelloWorld class from the OzApp class. Now override the BrandName and Name properties and setup a new brand name and name for your app.
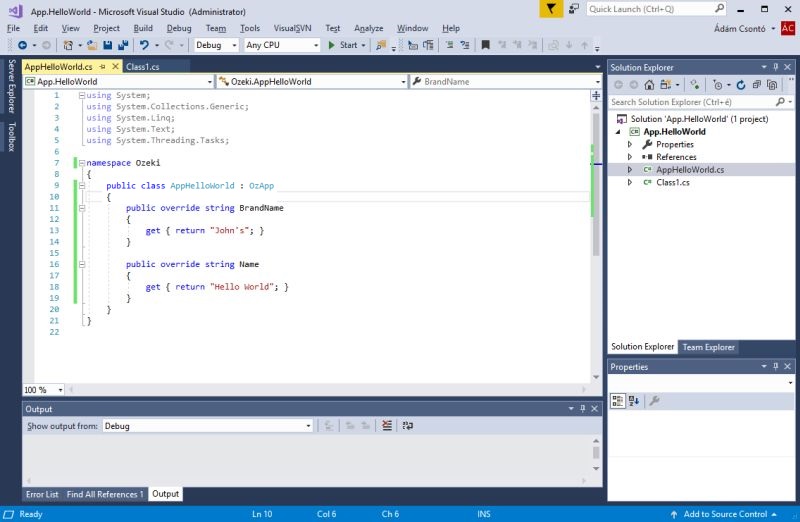
Figure 8 - Override the BrandName and Name properties
Create a place for the toolbar, the menu, and the user interface pages!
Now override the CreateGuiPages, the CreateGuiPages and the CreateToolbarButtons methods.
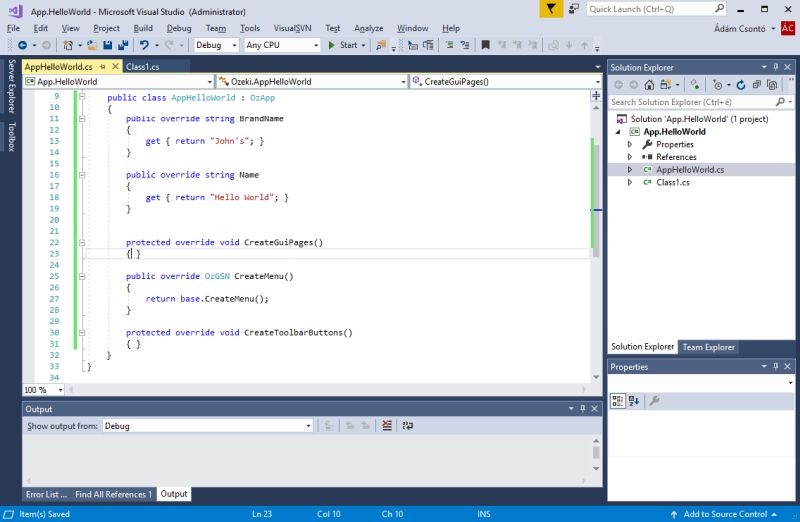
Figure 9 - Override the CreateGuiPages, CreateMenu and CreateToolbarButtons
Create your first page: About!
This page is a plain HTML text. You can write any HTML content you wish into the HTML string. Note that your page is derived from the OzGPC_Page base class. Note that we use a so called GPC (Gui Page Component) to add your HTML to your page.
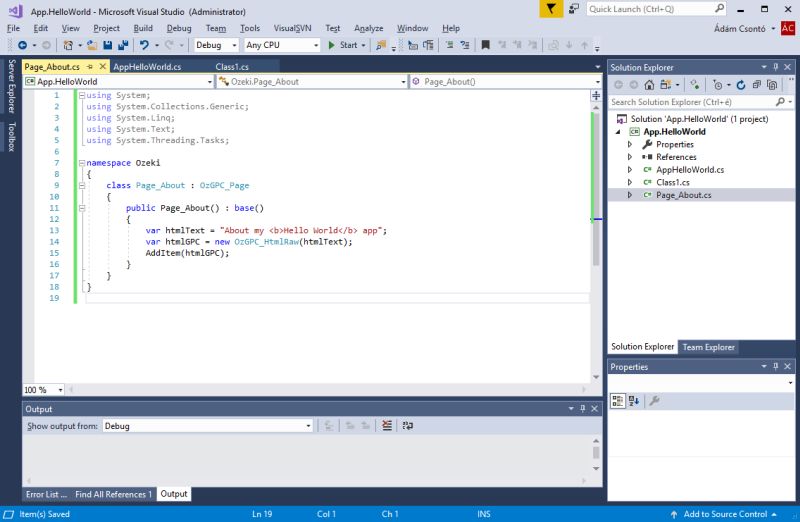
Figure 10 - About page
Create your second page: Home!
Note that on this page we use a different GPC (Gui Page Component) to add text. This label component offers more options then standard html. For example you can set its appearance using CSS, and you can define javascript events, such as OnClick, etc.
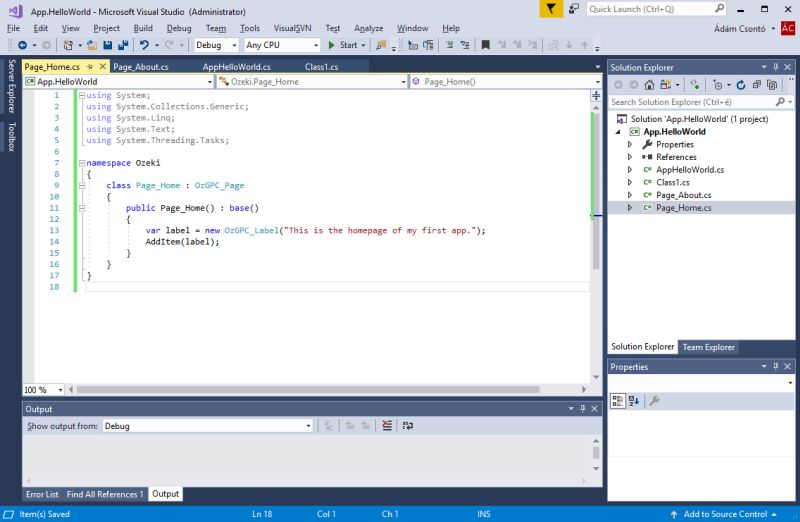
Figure 11 - Home page
Add the two newly created pages to your sitemap!
The sitemap is a tree structure that holds all your pages. Note that you can set the page's visibility and an Icon. The visibility is used by the menu and the toolbar. The two images are standard embedded resources (they can be found in the Ozeki.Resources.dll).
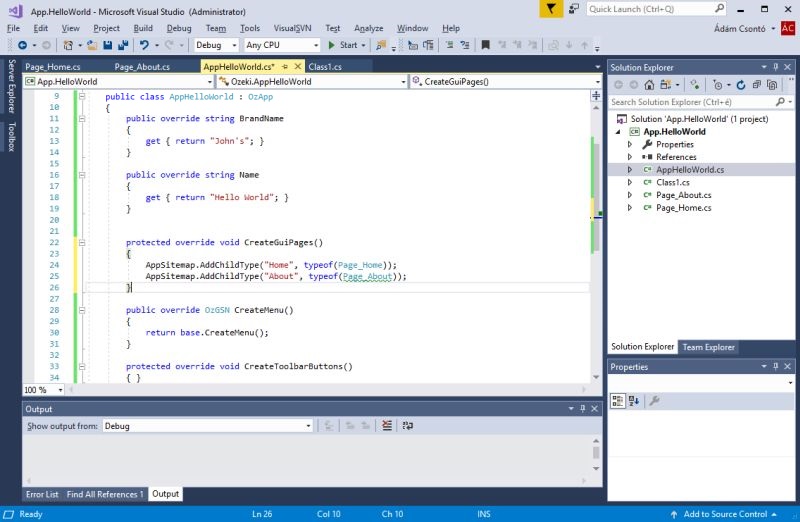
Figure 12 - Create sitemap structure
Create the toolbar!
The toolbar icons appear on the top of your webpage, between the content and the menu. You can create the toolbar button by overriding the CreateToolbarButtons method. You need to set the name of the page, az icon and a label using the OzGPC_ToolbarButton class, and the prefix of the application.
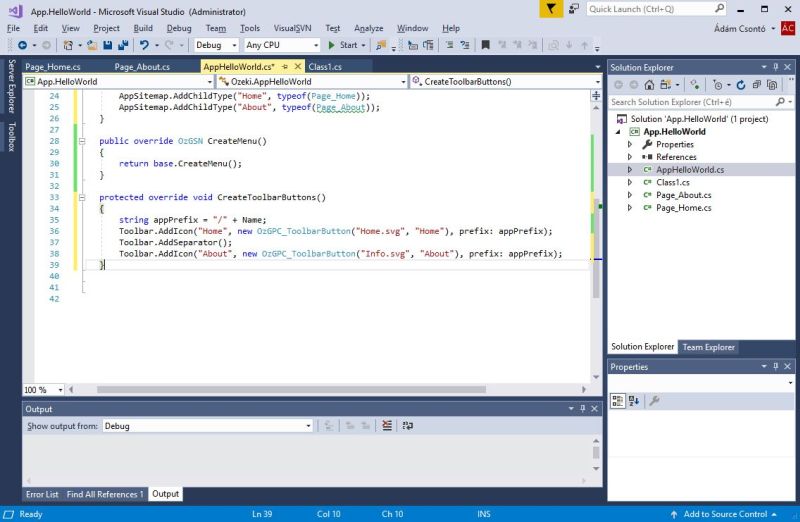
Figure 13 - Toolbar
Create the menu!
You can create your own menu structure by overriding the CreateMenu method. You can set the name of the menu, the page's visibility and an Icon.
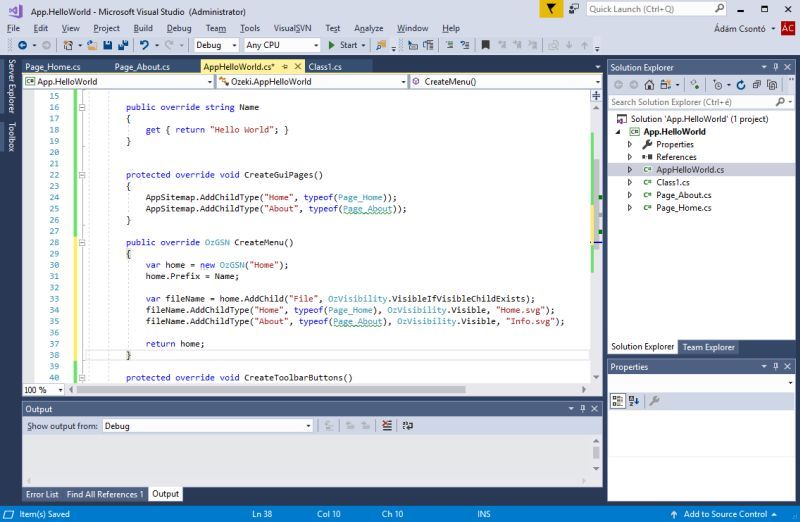
Figure 14 - Menu
Create a loader class!
This class is responsible for installing your app on the Ozeki 10 desktop and into the start menu. It is derived from the OzLoader class.
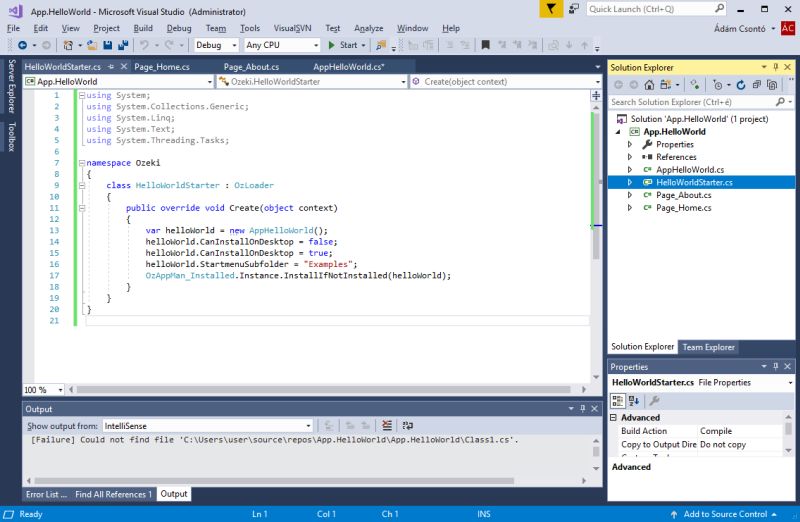
Figure 15 - Hello World Starter
Start your program!
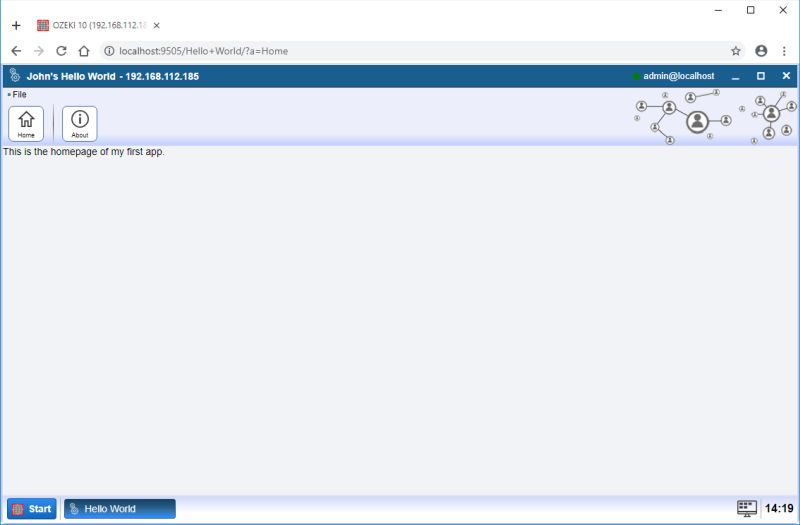
Figure 16 - Start your program